Ir al contenido










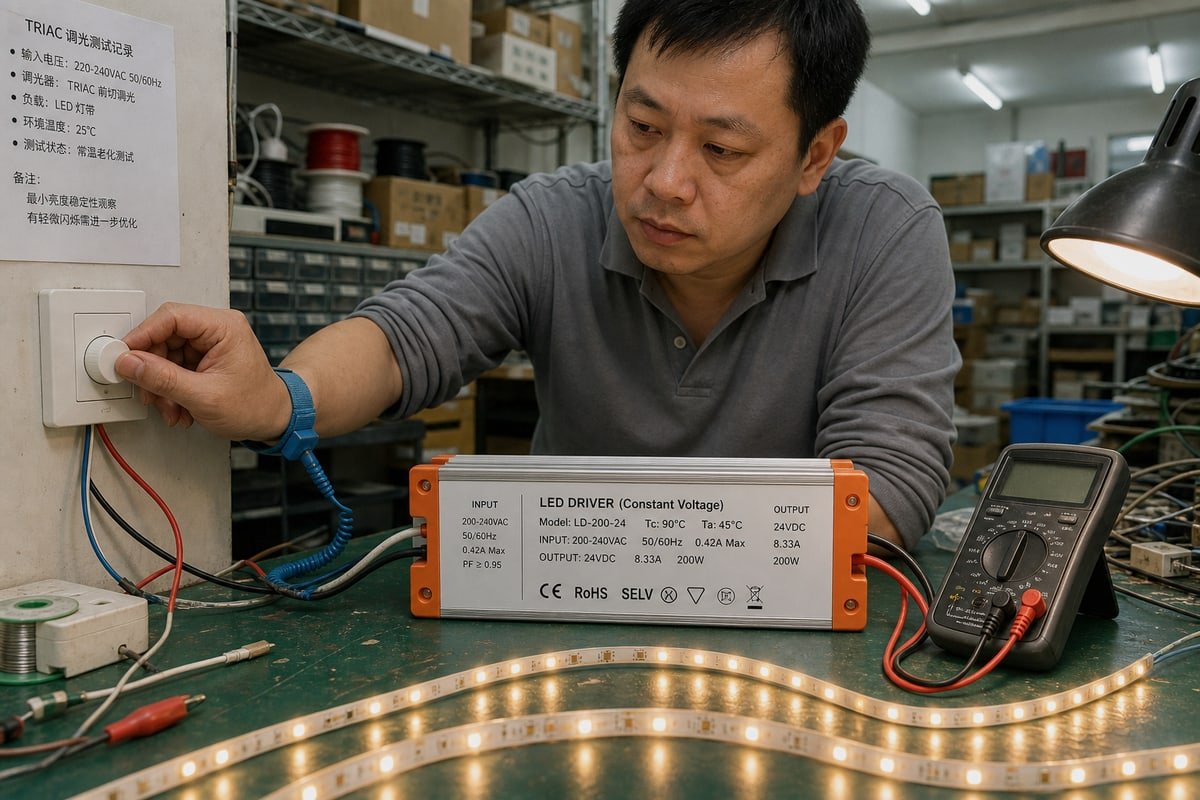
Las tiras LED de un cliente parpadearon gravemente en un proyecto hotelero el año pasado. Nuestro laboratorio en Shenzhen lo rastreó hasta los requisitos de carga mínima para los controladores CV TRIAC, una especificación que la mayoría de los compradores pasan por alto.
Un controlador LED de voltaje constante (CV) regulable por TRIAC puede necesitar una carga conectada mínima para un funcionamiento estable con un regulador de corte de fase TRIAC. Si la carga LED total cae por debajo del mínimo especificado del regulador, el sistema puede parpadear, zumbar, apagarse o conmutar de manera poco confiable. Siempre verifique las clasificaciones de carga tanto del regulador como del controlador.
Una nota rápida sobre terminología antes de profundizar. El TRIAC normalmente se encuentra dentro del regulador, no dentro de la etapa de salida de voltaje constante 1 del controlador LED. Entonces, cuando la gente dice “controlador CV TRIAC”, generalmente significa un controlador CV diseñado para aceptar entrada de corte de fase TRIAC. Esa distinción da forma a todo en este artículo. Vamos a desglosarlo pieza por pieza.
¿Cuál es el requisito de carga mínima para los controladores TRIAC CV y por qué es importante para mi proyecto?
El mes pasado, una distribuidora de iluminación en Singapur me envió un mensaje de WhatsApp: sus controladores regulables TRIAC de 6W parpadeaban con un regulador pero funcionaban perfectamente con otro. La terminología era la culpable.
El requisito de carga mínima es la potencia conectada más baja que un regulador de corte de fase TRIAC necesita para mantener su TRIAC interno enganchado y conduciendo. Importa porque las cargas por debajo de este umbral pueden causar parpadeo, caídas o conmutación poco confiable, incluso cuando el controlador CV en sí es completamente funcional.

Este es el punto que hago muy prominente con cada comprador: la carga mínima del regulador y la carga mínima del controlador LED son dos especificaciones diferentes. Confundirlas causa la mayoría de las fallas de campo que veo.
Dos Especificaciones, Dos Significados
Un regulador podría indicar una carga LED mínima de 10W. Un controlador podría indicar una carga de salida mínima de 2W. Estos números describen cosas completamente diferentes. El primero se refiere a si el regulador puede operar correctamente con la carga eléctrica conectada. El segundo se refiere a si el controlador puede regular su salida LED correctamente a una carga particular. Ambos deben cumplirse.
| Especificación | Pertenece A | Qué Gobierna | Ejemplo Típico |
|---|---|---|---|
| Carga LED mínima | El regulador de pared | Si el TRIAC permanece enganchado a través del ciclo de CA | Mínimo de 10W |
| Carga de salida mínima | El controlador LED | Si el controlador regula su salida de CC limpiamente | Mínimo de 2W |
| Corriente de mantenimiento | El TRIAC dentro del regulador | Corriente necesaria para permanecer conduciendo | 10–50 mA |
| Corriente de enganche | El TRIAC dentro del regulador | Corriente necesaria para comenzar a conducir cada medio ciclo | Varía según el dispositivo |
Por Qué los Vatios Solos No Cuentan la Historia
Aquí está la visión experta que siempre comparto. La carga mínima no es simplemente un problema de vatios. Es un problema de comportamiento eléctrico. Un Regulador de intensidad TRIAC fue diseñado alrededor de una carga resistiva 2, como una lámpara incandescente, que consume corriente predecible en toda la forma de onda de CA. Un controlador LED CV se comporta de manera muy diferente. Su etapa de entrada puede contener circuitos rectificadores, filtrado EMI, capacitores, electrónica de conmutación, corrección activa del factor de potencia 3, y limitación de corriente de irrupción. Entonces, un controlador LED de 6W no necesariamente “se ve” como una carga resistiva de 6W para el TRIAC. Es por eso que dos controladores diferentes de 6W pueden comportarse completamente diferente con el mismo regulador.
Esto también explica por qué un regulador de borde ascendente 4 lucha más con cargas electrónicas pequeñas que un regulador de borde descendente. Los diseños de borde descendente usan MOSFET y no necesitan corriente de mantenimiento, por lo que toleran mucho mejor la regulación de corte de fase de baja potencia.
¿Cómo calculo la carga mínima necesaria para mi configuración de driver CV TRIAC?
Cuando especificamos controladores para un proyecto de múltiples luminarias, siempre sopesamos una compensación: agregar margen de vatios aumenta el costo de los componentes, pero operar al borde del regulador arriesga llamadas de servicio.
Sume la potencia de entrada real de cada controlador en el circuito, luego compare el total contra las clasificaciones de carga LED mínima y máxima del regulador. También verifique la carga de salida mínima del propio controlador, el número máximo de controladores y la corriente de irrupción agregada antes de finalizar el diseño.

Las matemáticas en sí son simples. El juicio detrás de ellas no lo es. Siga este proceso y evitará los errores que veo en las consultas de proyectos cada semana.
- Encuentre la carga LED mínima publicada del regulador. Los reguladores de borde ascendente heredados a menudo especifican 20W–40W. Los controles de corte de fase modernos optimizados para LED pueden funcionar hasta 1W–3W. Nunca asuma; lea la hoja de datos.
- Encuentra la carga mínima de salida del driver. Algunos drivers anuncian que no tienen carga mínima. Otros definen una ventana de operación real: una hoja de datos de un driver CV regulable por TRIAC de 24V que evaluamos muestra un rango de carga de 33–100W con un consumo sin carga inferior a 1W. Eso es una ventana definida, no una garantía de ausencia de carga.
- Usa la potencia medida real, no las clasificaciones nominales de la luminaria. La tira LED a menudo consume menos de lo que sugiere su etiqueta.
- Verifica los totales contra las clasificaciones mínimas y máximas.
- Deja espacio libre. Operar exactamente en el mínimo invita a la inestabilidad a medida que los componentes envejecen y las temperaturas cambian.
Ejemplo práctico: calificado correctamente
Si el regulador especifica una carga LED mínima de 10W y la carga conectada real es de 6W, la combinación está fuera del rango de operación especificado del regulador y puede ser inestable. Nota que dije “puede”, no “será”. Algunos reguladores toleran cargas por debajo de su mínimo publicado; otros no. Operar fuera de la especificación simplemente significa que el fabricante ya no garantiza la estabilidad de la regulación.
La trampa de múltiples drivers
Esto importa para la iluminación comercial. Compara un driver de 6W contra veinte drivers de 6W. La carga nominal cambia de 6W a 120W, pero también cambian otras características eléctricas, especialmente la corriente de irrupción agregada 5 y la interacción de veinte circuitos de entrada en un solo regulador. Entonces, el cálculo correcto nunca es solo 6W × 20 = 120W.
| Verificación | Un solo driver de 6W | Veinte drivers de 6W |
|---|---|---|
| Carga en estado estable | 6W | 120W |
| Carga mínima del regulador de intensidad | Probablemente por debajo del mínimo | Cómodamente por encima del mínimo |
| Corriente de irrupción agregada | Despreciable | Potencialmente crítica |
| Número máximo de drivers por regulador | No es una preocupación | Debe verificarse con el fabricante |
| Pruebas de compatibilidad necesarias | Sí | Sí, en cantidad completa |
¿Qué problemas enfrentaré si mi carga de iluminación cae por debajo del requisito mínimo?
Nuestro equipo de control de calidad una vez quemó tres días persiguiendo un parpadeo que solo aparecía después de veinte minutos de funcionamiento. La causa nos enseñó lo engañosos que pueden ser los circuitos con carga insuficiente.
Las cargas por debajo del requisito mínimo pueden causar parpadeo del LED, zumbido audible, comportamiento de encendido repentino, zonas muertas en la parte superior del rango de atenuación, imágenes fantasma cuando se apagan y pérdida de señal a baja luminosidad. Algunos síntomas aparecen solo después de que el atenuador se calienta y su corriente de mantenimiento aumenta.

Ese detalle de calentamiento merece énfasis. El requisito de corriente de mantenimiento de un TRIAC es sensible a la temperatura y típicamente aumenta a medida que el dispositivo se calienta. Así que un sistema que parece estable al arrancar puede comenzar a parpadear veinte minutos después. Si tu instalador informa que “funcionó bien al principio”, sospecha de este mecanismo.
Mapa de síntoma a causa
| Síntoma | Causa posible |
|---|---|
| Parpadeo en nivel bajo | Carga insuficiente o incompatibilidad driver/regulador |
| Parpadeo en todo el rango | Incompatibilidad de corte de fase o entrada de driver inestable |
| Zumbido | Interacción eléctrica o mecánica entre regulador y driver |
| Se apaga durante la regulación | Interacción entre corriente de mantenimiento del TRIAC y corriente de entrada |
| No se apaga completamente | Corriente de fuga o comportamiento de entrada del driver |
| Funciona con varias luminarias pero no con una | Carga por debajo del mínimo |
| Funciona con una luminaria pero falla con muchas | Corriente de irrupción o número máximo de drivers |
Algunos de estos necesitan explicación adicional. El comportamiento de encendido repentino significa que los LED permanecen oscuros en ajustes bajos del regulador y se encienden abruptamente más arriba en el deslizador. Una zona muerta significa que la luz se mantiene al 100% de salida en la parte superior del recorrido del regulador. El efecto fantasma (un brillo tenue o parpadeo periódico en el estado OFF) a menudo aparece con reguladores inteligentes sin neutro, que consumen su energía de espera a través de la propia carga. Y el zumbido audible puede provenir de drivers que usan PWM en el lado secundario, lo que refleja pulsos de corriente de alta frecuencia de vuelta al lado primario y perturba la detección de cruce por cero del TRIAC.
¿Deberías agregar una carga ficticia?
Una solución común en campo es agregar una carga ficticia resistiva o un estabilizador de parpadeo para elevar el circuito por encima de la clasificación mínima del regulador. Eso puede funcionar, pero doy a cada comprador esta advertencia: agregar una carga ficticia puede resolver la inestabilidad por carga mínima, pero también aumenta el consumo de energía y el calor, y no necesariamente resuelve la incompatibilidad driver/regulador. Úsala solo cuando ambos fabricantes lo permitan. Recuerda: un problema de carga mínima no es un problema universal de compatibilidad. Si la etapa de entrada del driver es incompatible con la forma de onda del regulador, más vatios no curarán el parpadeo. También ten en cuenta que los drivers sin parpadeo con circuitos de purga activa internos concentran calor en niveles bajos de regulación, por lo que la gestión térmica importa incluso cuando los LED consumen casi nada.
¿Cómo puedo encontrar un proveedor de controladores CV TRIAC que cumpla con los requisitos de carga mínima y personalización de mi proyecto?
En nuestra línea de producción en Shenzhen, cada lote de controladores regulables por TRIAC se prueba contra una pared de reguladores reales antes del envío. Ese hábito surgió de lecciones difíciles con proyectos de exportación en Europa y el Sudeste Asiático.
Elija un proveedor que publique especificaciones de carga mínima y máxima, proporcione listas de compatibilidad con reguladores (dimmers), ofrezca personalización OEM/ODM de rangos de carga y circuitos de derivación, y pruebe los controladores contra reguladores de corte de fase reales. Solicite muestras, informes de prueba y soporte técnico antes de comprometerse con pedidos al por mayor.

En boqi, trabajamos exclusivamente con propietarios de marcas, mayoristas y fabricantes de iluminación, por lo que evalúo las preguntas de los proveedores desde la silla del comprador todos los días. Gerentes de compras como Olivia, uno de nuestros clientes a largo plazo en Singapur, se preocupan por tres cosas: el costo total del proyecto, los plazos ajustados y el acceso a la tecnología de diseño actual. Los requisitos de carga mínima para los controladores CV TRIAC afectan a los tres. Un controlador que falla en las pruebas de compatibilidad después de la instalación arruina tanto el presupuesto como el cronograma.
Preguntas que separan a los buenos proveedores de los riesgosos
No pregunte solo: “¿Cuántos vatios puede manejar este regulador TRIAC?” Pregunte tanto “¿Cuál es la carga LED mínima?” como “¿Cómo se comporta la entrada del controlador LED con este regulador?” Esa segunda pregunta es la que la mayoría de los proveedores no pueden responder. Un socio capaz debe decirle si su controlador admite regulación de fase directa, si también funciona con un regulador de borde posterior, cómo su circuito de sangrado maneja condiciones de baja carga y qué modelos específicos de reguladores han validado. Cuando desarrollamos un controlador OEM para un cliente europeo, probamos la estabilidad de regulación contra las marcas de reguladores de borde delantero comunes en ese mercado, porque un controlador que pasa en el entorno eléctrico de un país puede comportarse de manera diferente en otro.
Lista de evaluación de proveedores
| Qué hay que comprobar | Por qué es importante | Bandera roja |
|---|---|---|
| Especificaciones publicadas de carga mín/máx | Le permite diseñar circuitos con confianza | Hojas de datos vagas o faltantes |
| Lista de compatibilidad de reguladores | Confirma pruebas reales de regulación de corte de fase en el mundo real | “Afirmaciones de ”funciona con todos los reguladores TRIAC" |
| Capacidad OEM/ODM | Rango de carga y ajuste del circuito de sangrado para su mercado | Solo catálogo de talla única |
| Certificaciones (CE, CB) | Requeridas para mercados de la UE y exportación | Certificados no verificables |
| Soporte de muestras y pruebas | Valida su cadena exacta de regulador-controlador-carga | Negativa a enviar muestras de preproducción |
| Soporte técnico postventa | Solución rápida de problemas protege su cronograma | Respuestas lentas o guionizadas |
El mercado en sí es genuinamente confuso aquí. Algunas guías de proveedores insisten en que la regulación TRIAC aún necesita 25W–40W de carga, mientras que algunos fabricantes de controladores anuncian sin carga mínima en absoluto. Ambas afirmaciones pueden ser ciertas, porque describen productos diferentes y partes diferentes del sistema. El rendimiento de carga mínima es una especificación específica del diseño, no una regla universal de TRIAC. Un proveedor que explique eso honestamente es un proveedor en quien puede confiar su marca.
Conclusión
Los circuitos TRIAC con carga insuficiente parpadean, zumban y se apagan, y la solución comienza con un hábito: verifique la carga mínima del regulador, la carga mínima del controlador y su compatibilidad real juntos.
Notas al pie
- Resumen de Wikipedia sobre configuraciones de circuitos LED y características de la etapa de salida. ↩︎
- Documentación técnica de un fabricante líder de semiconductores sobre características eléctricas y cargas de TRIAC. ↩︎
- Entrada autorizada de Wikipedia que explica la corrección activa del factor de potencia para cargas electrónicas. ↩︎
- Entrada de Wikipedia que explica el funcionamiento y las diferencias técnicas entre tipos de reguladores de corte de fase. ↩︎
- Estándar NEMA que define características de corriente de irrupción y requisitos para equipos de iluminación LED. ↩︎